.svg)
Loads More Options...
UK Parcel Delivery
- Drop-Off Services
- Collection Services
- Same-Day Delivery
- Next-Day Delivery
- 2 to 3 Day
- 3 Days Plus
- Pallet Delivery
- Special Delivery
- Letters & Small Parcels
- Heavy Parcels
- Large Parcels
- Small Parcels
- Postage Costs
- All UK Delivery Services
- Send a Parcel
- No Printer Courier Services
- Advice on My Parcel Delivery
International Parcel Delivery
Our Range of Courier Services
About Parcel2Go.com
Parcel Delivery Tools
Choose Your Country
How to link your WooCommerce account
In this guide, we’ll give you a breakdown of how to link your WooCommerce account.
Scroll down if you'd like to view a step-by-step guide.
Step 1
Go to the ‘Account’ menu within the top navigation and click on ‘Linked Account’.
Step 2
Next to the WooCommerce logo click ‘Link New Account’.
If you know your ‘Consumer Key’, ‘Consumer Secret’ and ‘Shop URL’ you can enter these into the fields provided and click ‘Link My WooCommerce Account’. If you need help finding this information, continue on to Step 3.
Step 3
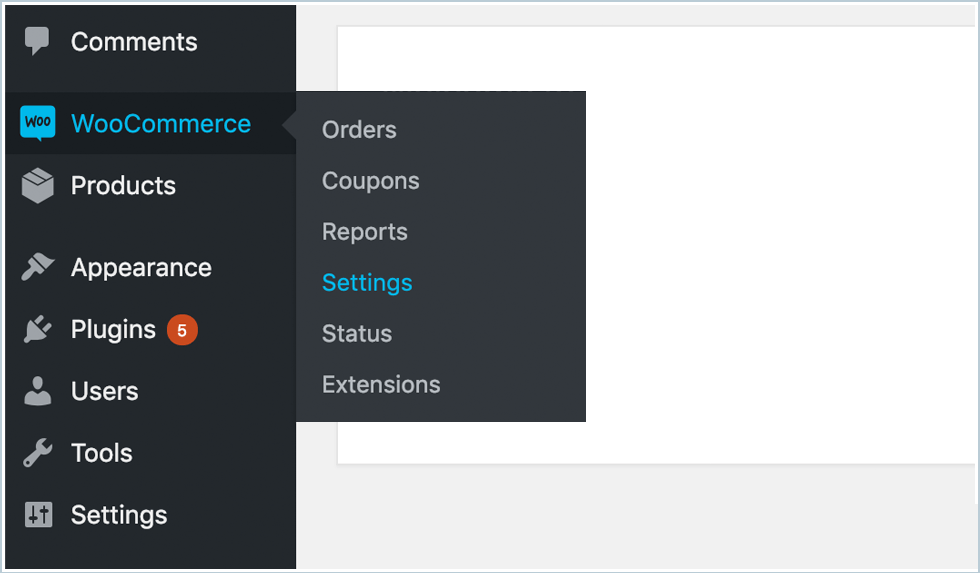
To set up your keys go to the ‘WooCommerce’ dashboard within your WordPress account and click on ‘Settings’.
Step 4
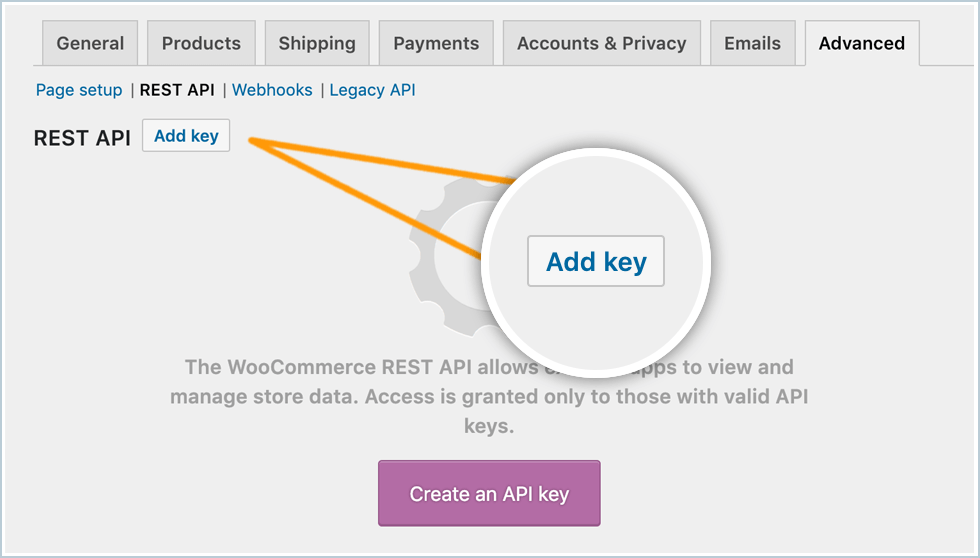
Go to the ‘Advanced’ tab, click on ‘REST API’ and then click on ‘Add Key’.
Step 5
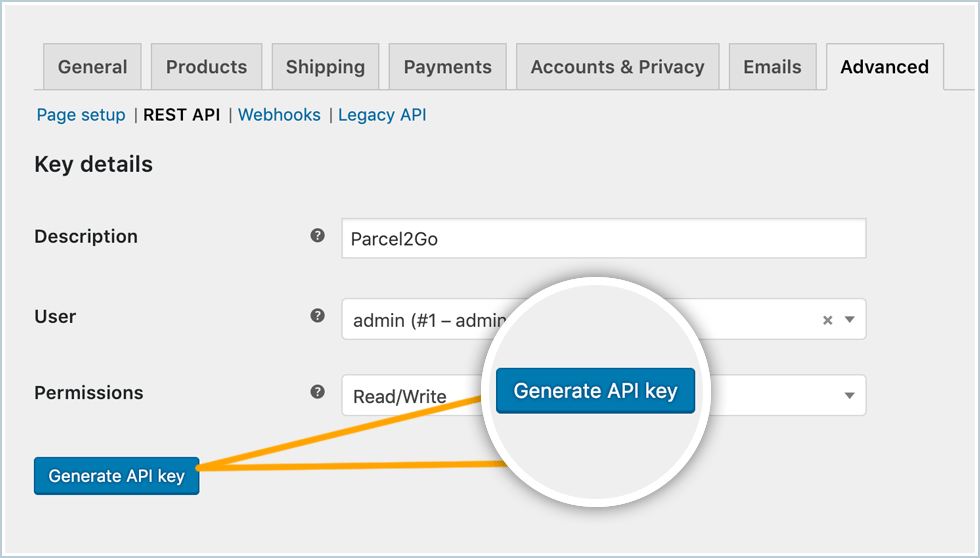
Add a ‘Description’ for example ‘Parcel2Go’. Choose a ‘user’ from the dropdown and then pick your ‘Permisssions’. If you want to receive automatic tracking updates choose ‘Read/Write’. Click on ‘Generate API Key’.
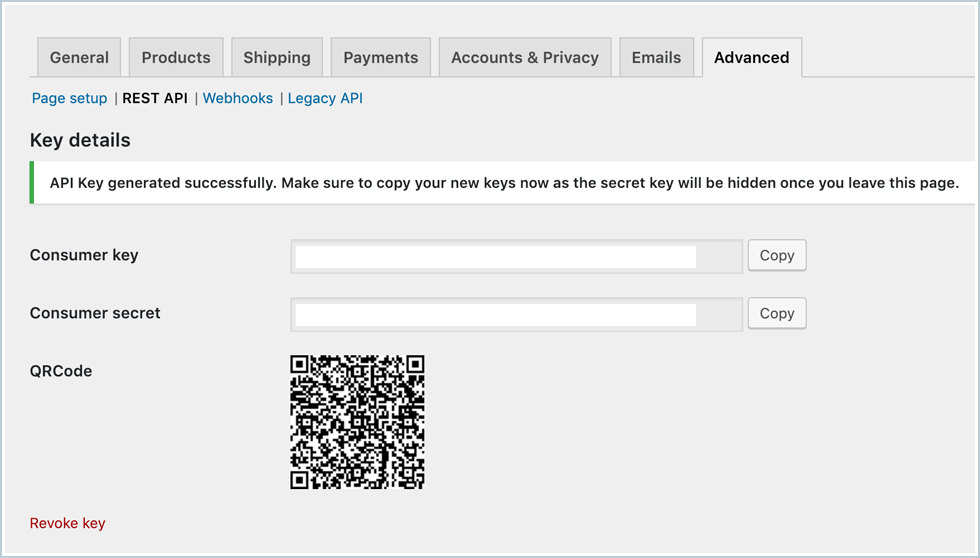
Step 6
Take note of your generated ‘Consumer Key’ and ‘Consumer Secret’.
Step 7
Enter your details into the fields on the integrations page, making sure you include http:// or https:// on the Shop URl field, click on ‘Link My WooCommerce Account’.
You have successfully linked your WooCommerce account.
Please Note:
Items will only be imported into Smart Send when your items are listed as ‘Processing’.